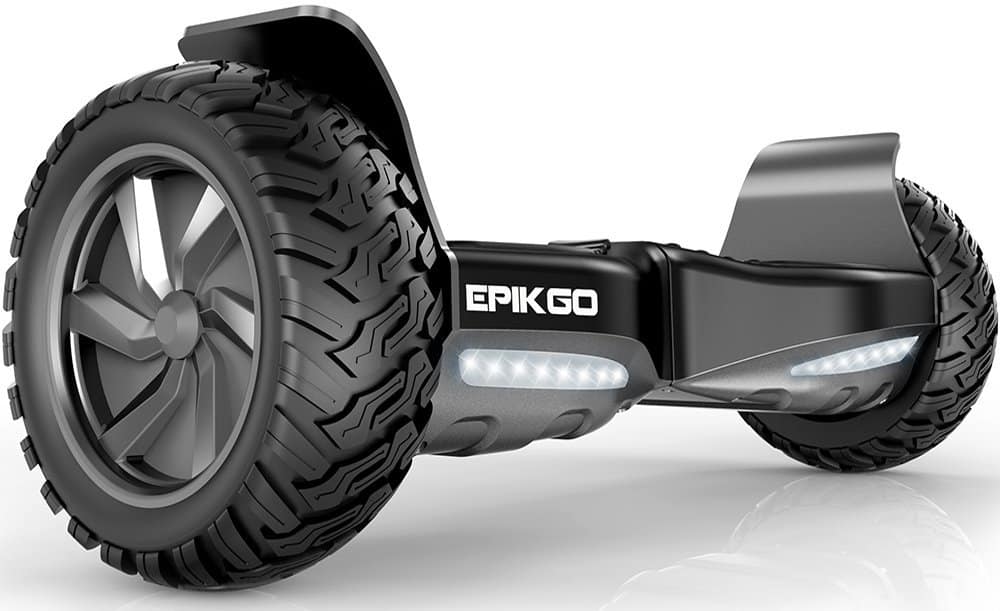
Once you buy your hoverboard and start using it for a while, you are likely to encounter issues with outdated and faulty batteries. If you’ve already checked the battery, however, then your issue could be the charging port. Don’t fret! Swapping out or repairing the port on most hoverboards is a relatively simple procedure that can be done with just a couple of common household tools.
KEY TAKEAWAYS:
- Even the best hoverboard charging ports can become damaged and degrade over time, and this may necessitate a replacement.
- Make sure to purchase a replacement charging port that can integrate with your pre-existing hoverboard.
- Open up the hoverboard, remove the old charging port, and put in the new one according to the unique design of your hoverboard.
Tools Needed: Replacement port, screwdriver, glue gun, multimeter (optional)
How To Change Hoverboard Charging Ports
STEP 1Identify the Problem
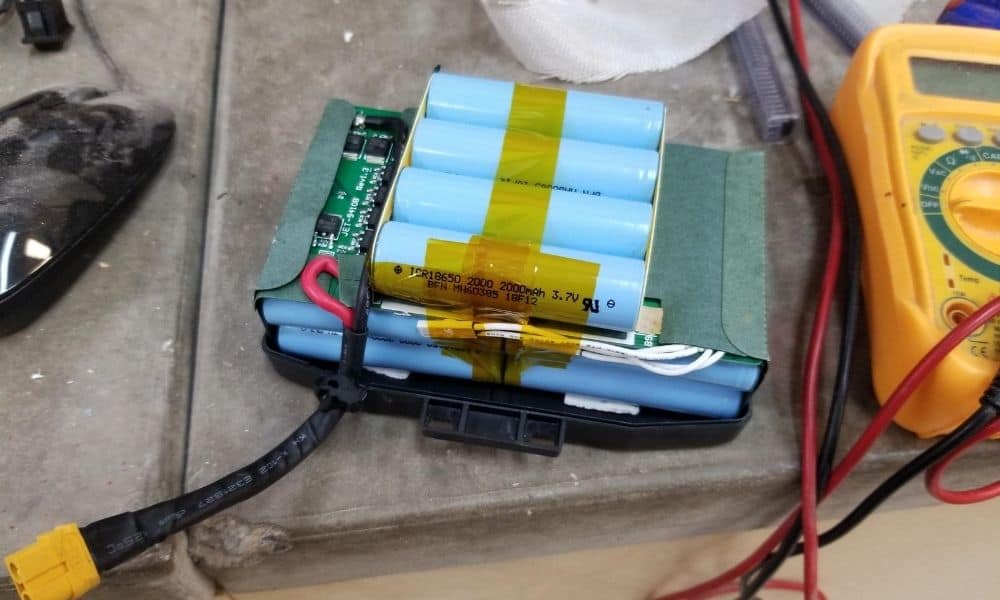
First of all, you’ll want to test the self-balancing scooter’s lithium battery with a multimeter or a related tool in order to rule out battery failure. Switching out a dead battery is a much simpler process, after all.
Once you have ensured that the battery itself is functioning properly, find which side of the hoverboard the charging port is located and then do a visual inspection. Is there anything obviously out of place? Is the port itself loose? Did a prong chip off during some off-road racing? If everything looks fine on the outside, and the charger still won’t operate, then it is time for the replacement procedure.
STEP 2 Purchase a Replacement Port
When you are certain that the hoverboard’s issue is port-related, it is time to purchase a replacement port kit. These kits are available throughout the Internet, including Amazon. There are a whole lot of hoverboards to choose from, though, each with its own specific internal components. So do some research to make sure the port kit you are thinking of purchasing can be fitted and used by your hoverboard.
STEP 3 Gather Your Tools
You’ll need just two relatively common household tools in order to complete the charging port replacement. Gather up a screwdriver that will fit the screws surrounding the charging port and a simple household glue gun. Some hoverboards may not even require the glue gun but, as they say, better safe than sorry.
STEP 4Remove the External Casing
Grab your screwdriver and unscrew the side of the hoverboard that includes the charging port, making sure to store the screws in a safe place nearby. You only have to worry about opening up the side that houses the charging port, as hoverboards typically house both the charging port and the power port on the same side. If your hoverboard is designed differently, with each port occupying different sides, then you’ll have to unscrew both sides. This is, however, is an extremely uncommon design choice.
STEP 5Find the Charging Pin
Once you open up the external casing you are going to see several different wires. Don’t get overwhelmed. You just need to focus on the wire attached to the charging pin. The charging pin is typically a four-pin prong that is attached to the main motherboard. Simply do a wire to prong search, following the charging port to the connector attached to the circuit board.
STEP 6Remove the Charging Pin and Charging Port
Removing the charging pin from the circuit board should be incredibly easy. Simply apply gentle pressure and pull it off. In order to remove the charging port itself, you will likely have to remove a fair amount of glue. This can be done simply with your hands. In other words, you should be able to just peel it right off. Remove enough glue so that the nut holding the charging port dislodges from the casing. The nut will then have to be slid down the wire, beyond the connector. Store this nut with the screws you removed earlier. Once the nut has been removed, simply slide off the old charging port and get ready to install the new one.
STEP 7 Install the New Charging Port
To install the new charging port, simply repeat the previous procedure in reverse. Retrieve the nut you set aside earlier, slide it onto the new charging port, taking care to squeeze the port and accompanying wires through the porthole. Screw the nut in place and plug the port connector into the main circuit board. The connector should be plugged into the same spot you removed the old connector from earlier.
STEP 8Glue it up
This is where the glue gun comes into play. Remember the glue you peeled away earlier in order to dislodge the nut? You will want to re-apply that glue using a glue gun, so as to make sure the nut, and the charging port, remain firmly affixed to the external casing. In our experience, less is more when it comes to glue but use your best judgment.
STEP 9Attach the External Casing
Continue working in reverse, taking care to re-attach the external casing to the hoverboard itself. Affix the casing to the hoverboard and retrieve the screws you set aside earlier. Screw them back in until the hoverboard appears sturdy. Then wait an hour or two for the glue to fully harden.
STEP 10 Charge it Up
That’s it. Your hoverboard charging port has been fully replaced and should accept a charge. Once the lithium-ion battery is fully charged, via the charger, the hoverboard should be ready to go. Take it out for a spin and have some fun. You’ve earned it.
Charging Tips
Check the Battery
Before you go ahead and replace the charging port, be sure to check the battery itself. The battery could be dead and replacing that battery is an easier task than replacing the entire charging port. This can be done via a multimeter tool or another method of voltage maintenance. You may also want to perform a similar check on the charger, to ensure you don’t have a bad battery charger.
Port Location
Make sure to take your time to locate the port within the external casing of the hoverboard. Hoverboards are generally split into two sides, so you should only have to remove half of the casing that houses the charging port. In other words, look for the side where the charger plugs in.
Screw Storage
As you are removing screws, be sure to group them together, particularly if there is more than one type of screw located throughout the casing. This also goes for the nut that is attached to the charging port itself. You may also want to store the charger somewhere safe.
Gather Tools Beforehand
Be sure to gather your tools before you start the procedure, so you can be sure you have everything on-hand for the removal and the installation. The tools you’ll need for this procedure include a screwdriver and a glue gun.
Warnings
Get the Right Kit
Not all charging port kits are created equal. Make sure the kit you purchase is designed to fit your hoverboard. There should be documentation that lists the makes and models the kit is designed to work with somewhere on the manufacturer’s website.
Power Down
Make sure you have completely powered down the hoverboard before attempting repairs of any kind. This is extremely important. It may also be a good idea to let the battery completely drain out before you open up the casing.
Go Easy on the Glue
When re-attaching the nut and the charging port, take it easy on the glue. Use just enough so that the nut and port are firmly secured to the external casing. There are some sensitive electronics underneath the hood of a hoverboard and using too much glue can muck some of it up.
Wait a Bit Before Use
Once you have successfully completed the procedure, you should wait a few hours before riding your hoverboard. This will give the glue enough time to fully harden, thus increasing safety.
F.A.Q.S
Is there an alternate way to charge hoverboards besides the charging port?
Not really. Though some gadgets allow for various types of charging methods, including capacitive and cable-free charging, hoverboards have not begun to adopt these technologies.
How much is a hoverboard charging port replacement kit?
The prices vary, depending on the manufacturer and the hoverboard it is designed to interact with. These kits can cost anywhere from 10 dollars to 50 dollars or more.
Do all hoverboards take the same charger?
No. To answer the question, there are a wide variety of charger types designed to fit various makes and models of hoverboards. Before you purchase a charger or a charging port, do some research to ensure that they will fit your hoverboard.
How long will a hoverboard battery last before needing a recharge?
Assuming your charging port and your battery are both in good order, the lithium battery should allow for anywhere from four to six hours of continuous use before needing a recharge.
How long does a hoverboard battery last before needing to be replaced?
Modern hoverboard batteries should be able to last up to two years before needing a replacement. This does vary, depending on how often you use the item and what kind of strain you are placing on the product.













![Best 10 Inch Hoverboards in [year] 27 Best 10 Inch Hoverboards in 2025](https://www.gadgetreview.dev/wp-content/uploads/best-10-inch-hoverboard-image.jpg)
![Best Single Wheel Hoverboards in [year] 28 Best Single Wheel Hoverboards in 2025](https://www.gadgetreview.dev/wp-content/uploads/best-single-wheel-hoverboard-image.jpg)
![Best 8 Inch Hoverboards in [year] 29 Best 8 Inch Hoverboards in 2025](https://www.gadgetreview.dev/wp-content/uploads/best-8-inch-hoverboard-image.jpg)
![Best Hoverboards for Girls in [year] 30 Best Hoverboards for Girls in 2025](https://www.gadgetreview.dev/wp-content/uploads/best-hoverboards-for-girls-image.jpg)
![Best Hoverboards for Adults in [year] 31 Best Hoverboards for Adults in 2025](https://www.gadgetreview.dev/wp-content/uploads/best-hoverboard-for-adults-image.jpg)
![Best Hoverboard Accessories in [year] 32 Best Hoverboard Accessories in 2025](https://www.gadgetreview.dev/wp-content/uploads/best-hoverboard-accessories-image.jpg)
![Best 6.5 Inch Hoverboards in [year] 33 Best 6.5 Inch Hoverboards in 2025](https://www.gadgetreview.dev/wp-content/uploads/best-6.5-inch-hoverboard-image.jpg)
![Best Bluetooth Hoverboards in [year] 34 Best Bluetooth Hoverboards in 2025](https://www.gadgetreview.dev/wp-content/uploads/best-bluetooth-hoverboards-image.jpg)
![Best Knee Pads for Hoverboards in [year] 35 Best Knee Pads for Hoverboards in 2025](https://www.gadgetreview.dev/wp-content/uploads/best-knee-pads-for-hoverboard-image.jpg)
![Best Hoverboard for Beginners in [year] 36 Best Hoverboard for Beginners in 2025](https://www.gadgetreview.dev/wp-content/uploads/best-hoverboards-for-beginners-image.jpg)
![Best Helmets for Hoverboards in [year] 37 Best Helmets for Hoverboards in 2025](https://www.gadgetreview.dev/wp-content/uploads/best-helmet-for-hoverboard-image.jpg)
![Best Hoverboard Carrying Bags in [year] 38 Best Hoverboard Carrying Bags in 2025](https://www.gadgetreview.dev/wp-content/uploads/best-hoverboard-carrying-bag-image.jpg)
![Best Hoverboard Seats in [year] 39 Best Hoverboard Seats in 2025](https://www.gadgetreview.dev/wp-content/uploads/best-hoverboard-seat-image.jpg)
![Best Hoverboard in [year] ([month] Reviews) 40 Best Hoverboard in 2025 (April Reviews)](https://www.gadgetreview.dev/wp-content/uploads/best-hoverboard-image.jpg)
![Fastest Hoverboard in [year] ([month] Reviews) 41 Fastest Hoverboard in 2025 (April Reviews)](https://www.gadgetreview.dev/wp-content/uploads/fastest-hoverboard-epikgo.jpg)
![Best Hoverboard For Kids in [year] ([month] Reviews) 42 Best Hoverboard For Kids in 2025 (April Reviews)](https://www.gadgetreview.dev/wp-content/uploads/Best-Hoverboards-For-Kids.jpg)
![Best RV Battery in [year] ( [month] Reviews) 44 Best RV Battery in 2025 ( April Reviews)](https://www.gadgetreview.dev/wp-content/uploads/best-rv-battery.jpg)

![Razor Hovertrax 2.0 Hoverboard Review in [year] 54 Razor Hovertrax 2.0 Hoverboard Review in 2025](https://www.gadgetreview.dev/wp-content/uploads/Razor-Hovertrax-2.0-Hoverboard-Review.jpg)
